Getting Started with Jesmonite AC100 - A Beginner's Guide
Jesmonite AC100 has taken the crafting and art world by storm. This eco-friendly acrylic-based composite material offers incredible versatility, from creating home decor pieces to professional sculptures. Whether you’ve seen stunning Jesmonite creations on social media or you’re looking for a safer alternative to traditional resins, this guide will help you get started with confidence.
What is Jesmonite AC100?
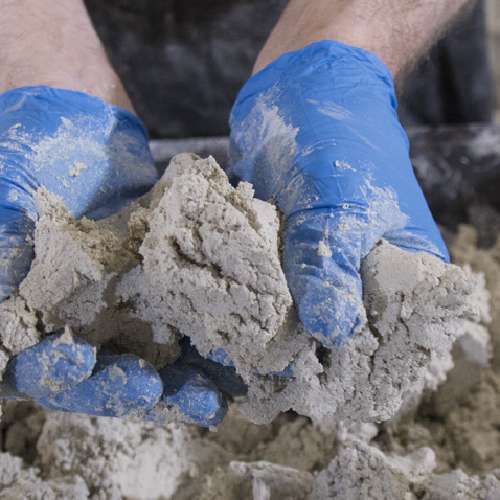
Jesmonite AC100 is a two-part acrylic-based system consisting of a liquid component and a base powder. When mixed together, they create a versatile material that can be cast into molds, brushed onto surfaces, or sculpted directly. Unlike polyurethane or polyester resins, Jesmonite is water-based, making it safer to use and more environmentally friendly.
Why Choose Jesmonite?
- Low odor - No strong chemical smells
- Water-based - Easy cleanup with soap and water
- Non-toxic - Safer for home and studio use
- Versatile - Cast, brush, or sculpt applications
- Beautiful finishes - Natural stone-like appearance
- Eco-friendly - Lower environmental impact than traditional resins
Understanding the AC100 System
The system consists of two components that must be used in specific ratios:
AC100 Base - Fine powder that forms the structure
AC100 Liquid - Acrylic resin that binds everything together
The standard mixing ratio is 2.5 parts base to 1 part liquid by weight. This ratio is crucial for proper curing and final strength.
Essential Equipment
Basic Starter Kit
- Digital scale (accurate to 1 gram)
- Mixing containers (plastic or silicone)
- Mixing tools (spatulas or stirrers)
- Measuring cups
- Silicone molds
- Release agent
- Protective gloves
- Dust mask (for handling powder)
Optional but Helpful
- Vibrating plate (removes air bubbles)
- Jesmonite pigments
- Metal powders for cold casting effects
- Brushes for brush-on applications
- Sealers for finishing
Your First Project - Basic Casting
Step 1: Prepare Your Workspace
Set up in a well-ventilated area. Cover surfaces with plastic or newspaper. Have all materials within reach, as Jesmonite sets quickly.
Step 2: Prepare Your Mold
Apply release agent to your silicone mold. While many silicone molds work without release, it ensures easy demolding and extends mold life.
Step 3: Weigh Components
Using your digital scale:
- Weigh liquid first (easier to clean container)
- Calculate required base (liquid weight × 2.5)
- Weigh base in separate container
Example: 100g liquid requires 250g base
Step 4: Mix Thoroughly
Add liquid to base (not the reverse). Mix thoroughly for 60-90 seconds until you have a smooth, lump-free consistency. Work quickly - you have only 15-20 minutes working time.
Step 5: Pour and Vibrate
Pour the mixture into your mold. Tap the mold on your work surface or use a vibrating plate to release trapped air bubbles.
Step 6: Cure
Allow to cure for at least 24 hours before demolding. Full strength develops over 5-7 days.
Adding Color to Jesmonite
Jesmonite Pigments
Purpose-made pigments designed for the AC100 system offer:
- Consistent color throughout
- No effect on curing
- Wide color range
- Add 1-8% pigment to liquid before mixing
Creating Marbling Effects
Layer different colored mixes:
- Pour first color
- Add second color while first is still wet
- Swirl gently with a stick or let them marble naturally
- Don’t overmix or colors become muddy
Terrazzo Effects
Mix solid-colored chips or aggregates into the base:
- Dried colored Jesmonite pieces
- Glass chips
- Stone fragments
- Metallic flakes
Brush-On Applications
Jesmonite excels in brush-on applications for creating lightweight, strong shells:
- Mix slightly thicker consistency
- Apply thin first coat to capture details
- Build up layers (typically 3-4 coats)
- Add reinforcement between layers (chopped fibers or gauze)
- Each layer should be 2-3mm thick
- Allow partial cure between layers (20-30 minutes)
Create stunning cold-cast metal effects:
- Mix metal powder with liquid first (40-60% by weight)
- Add base powder and mix thoroughly
- Apply as first layer in mold
- Follow with plain AC100 backup layers
- After demolding, polish to reveal metal finish
Popular metal powders:
- Bronze (classic sculpture look)
- Copper (warm tones, can patina)
- Brass (golden finish)
- Iron (can rust for weathered effects)
Troubleshooting Common Issues
Sticky Surface
- Incorrect ratio (too much liquid)
- Insufficient mixing
- Cure in warmer conditions
- Wait longer before demolding
Air Bubbles
- Mix more gently
- Use vibrating plate
- Spray with isopropyl alcohol
- Apply first coat with brush, then pour
Cracks or Brittleness
- Too much base (incorrect ratio)
- Dried out too quickly
- Cover with plastic during cure
- Increase liquid slightly in dry conditions
Won’t Release from Mold
- Use release agent
- Wait full cure time
- Warm mold slightly with hands
- Ensure mold has no undercuts
Finishing Your Jesmonite Pieces
Sanding
- Wait 5-7 days for full hardness
- Start with 240 grit, progress to 800+
- Wet sand for best results
- Wear dust mask
Sealing
Jesmonite is porous and should be sealed:
- Jesmonite Sealer (best option)
- Clear acrylic spray
- Water-based varnish
- Wax for matte finish
Painting
- Prime first for best adhesion
- Acrylics work well
- Can leave natural stone-like finish
- Seal after painting
Storage and Safety
Material Storage
- Keep base powder dry and sealed
- Liquid stores for 6-12 months
- Label all opened containers
- Store in cool, dry conditions
Safety Practices
- Wear dust mask when handling powder
- Use gloves to prevent skin irritation
- Ensure good ventilation
- Clean up spills immediately with water
- Wash tools before material sets
Tips for Success
- Measure accurately - The ratio is critical
- Work quickly - 15-20 minute working time
- Mix thoroughly - Lumps won’t disappear later
- Temperature matters - Warmer is faster (but less working time)
- Start simple - Master basic casting before complex techniques
- Keep it clean - Clean tools immediately after use
- Experiment - Test colors and techniques on small pieces
- Be patient - Full strength takes days to develop
Common Projects for Beginners
- Coasters and trays
- Plant pots and planters
- Jewelry dishes
- Wall tiles and decorative panels
- Small sculptures
- Decorative objects
- Candle holders
- Trinket boxes
Jesmonite AC100 is an incredibly rewarding material to work with. Its forgiving nature, beautiful natural finish, and eco-friendly properties make it perfect for beginners while offering enough versatility to keep experienced artists engaged. Start with simple projects, master the basic techniques, and you’ll soon be creating professional-quality pieces that showcase the unique beauty of Jesmonite.